ELASTIC K8S SERVICE

TASK-
- Create an EKS cluster
- Connect EKS with EFS
- Launch WordPress and MySQL
- Launch Prometheus and Grafana
ABBREVIATIONS-
- AWS- AMAZON WEB SERVICES
- EKS- ELASTIC KUBERNETES SERVICE
- EFS- ELASTIC FILE SYSTEM
- EC2 — ELASTIC COMPUTE CLOUD
- K8S — KUBERNETES
- IAAS — INFRASTRUCTURE AS A SERVICE
- PAAS — PLATFORM AS A SERVICE
- SAAS — SOFTWARE AS A SERVICE
- VPC — VIRTUAL PRIVATE CLOUD
AWS -
AWS is a public cloud that provides IaaS, PaaS, and SaaS. It works on a pay as you go, model. It provides almost all the services which are required to start a startup. Here in this task, we will use some of its services.
KUBERNETES-
Kubernetes is an open-source Container Orchestration System that provides Auto-scaling, Deployment, Load Balancers, and Management, etc.
EKS-
EKS is a service that is managed by Kubernetes Service. It is internally integrated with AWS CloudWatch, AWS CloudFormation, VPC, AWS EC2, etc. EKS makes the cluster that has a master node that cannot be seen by the tenant but worker nodes can be seen by the client.
PROCESS TO CREATE CLUSTER BY EKS-
Now we proceed to do the task.
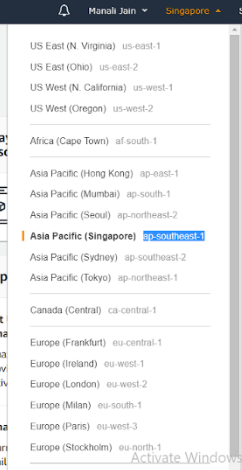
REGION USED -
Select the region where you want to make the cluster.
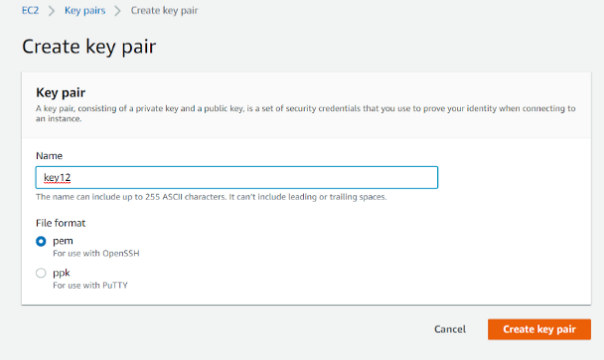
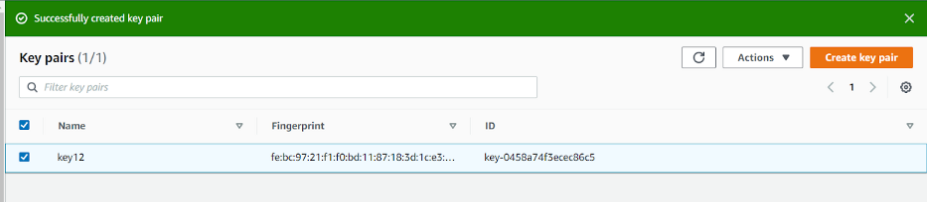
CREATE KEY PAIRS -
Make a key pair so will be attached later to node groups.

EKS FOLDER-
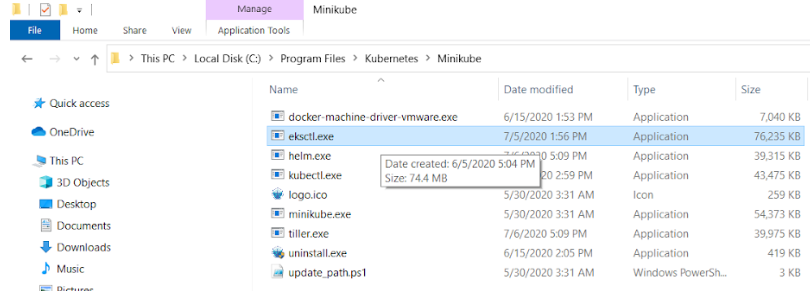
Set the PATH in the environment variables.

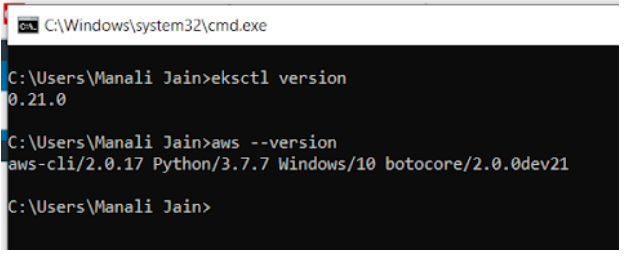
CHECK THE VERSION-
Now check the version of eksctl and aws so you get confirmed that it is installed.
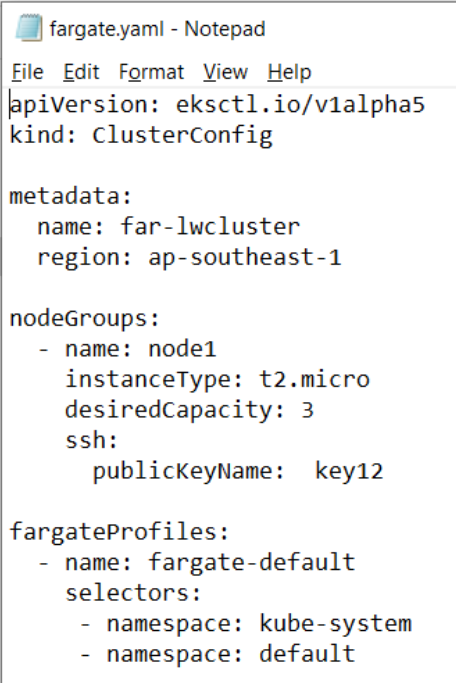
EKS CLUSTER-
Now, create the EKS cluster

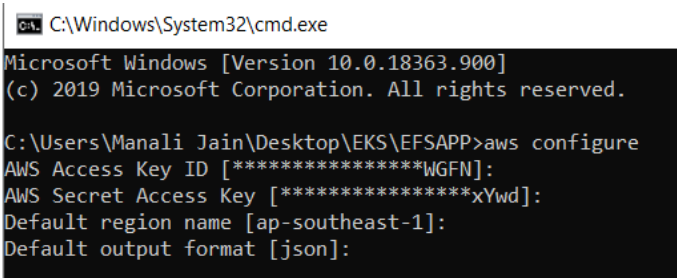
CONFIGURE AWS ACCOUNT-
In the Background, EKS will connect to the AWS IAM account.

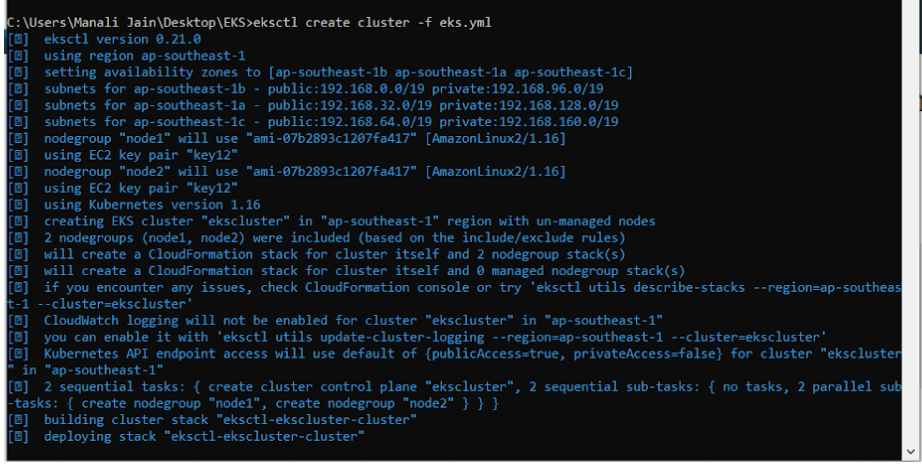
CREATE EKS CLUSTER-
Now finally we are launching the EKS Cluster by the command “eksctl create cluster -f file.yml”.
While launching the cluster it is showing what setup it is doing-
- Checking eksctl version
- Using the region we assign to the cluster in our code.
- Setting Availability Zone and allocation subnets in each.
- Creating an EC2 instance and using the key we gave to it
- Creating the eks cluster.
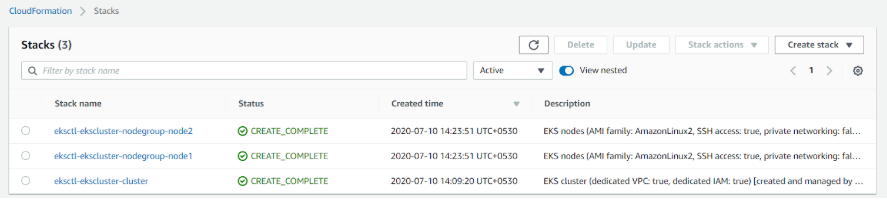
- Creating CloudFormation stack
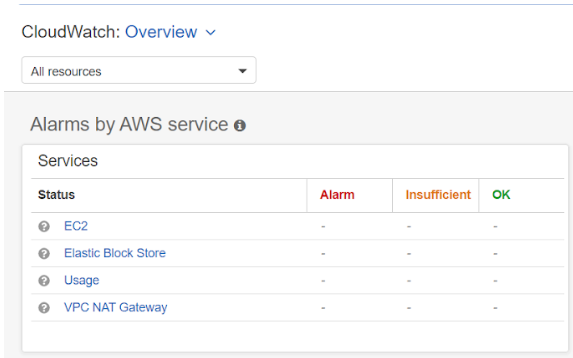
- Logging to CloudWatch
- And many more…..
I will be going to tell you everything whatever is possible.
See the Stack work is in progress.

The Cluster is Creating.

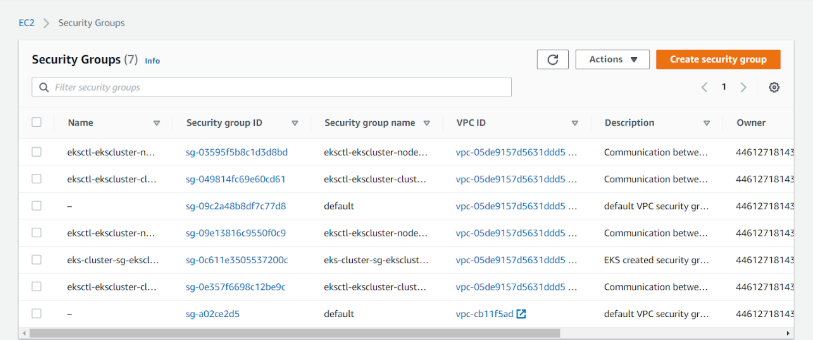
The Security Groups made for the instances by the eks code.
Instances are launching.

Momentarily the cluster is ready, see the differences pending to active.
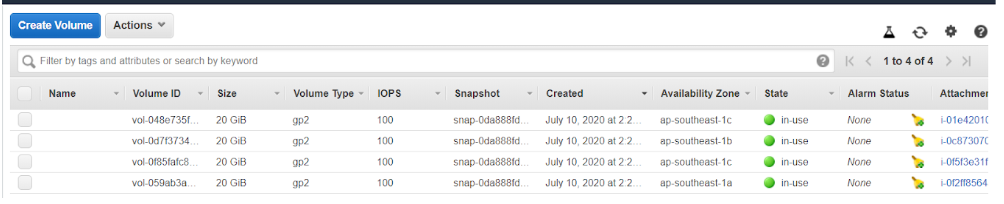
Volumes are Attached to the Instances.
Stacks are created.
Instances are Active.

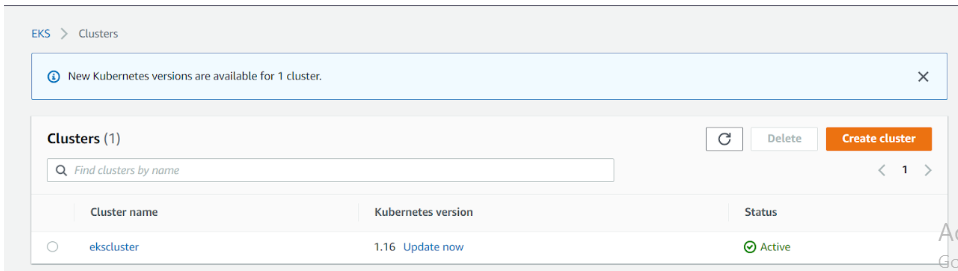
And Finally, the cluster is created. It is so easy right!!
The CloudWatch is used by these services.
EKS CLUSTER CREATED-
By the command “eksctl get cluster” we can see the cluster is present or not.

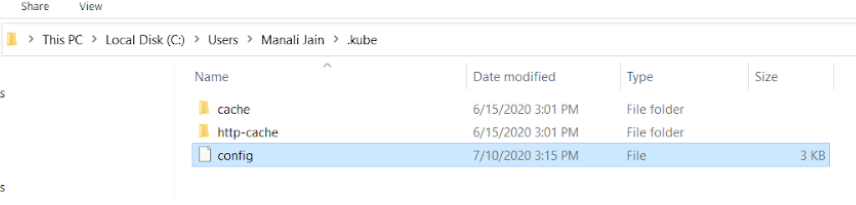
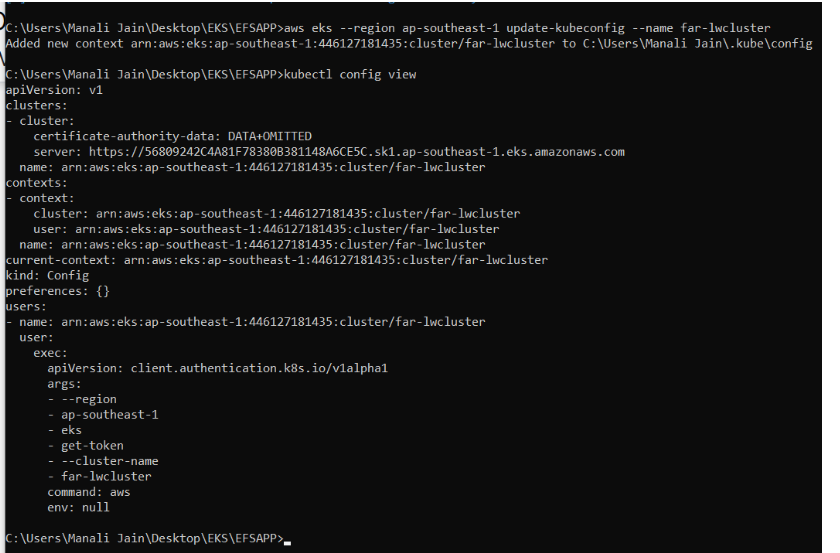
UPDATE THE CONFIG FILE-
To update the config file we used the command “aws eks update-kubeconfig — name clustername”. give the name of the cluster for which you want to update the file.

Here it is present.
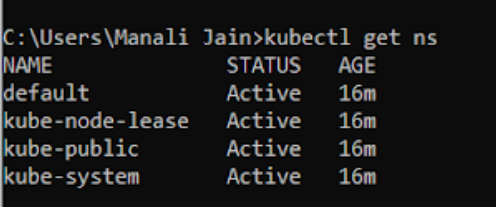
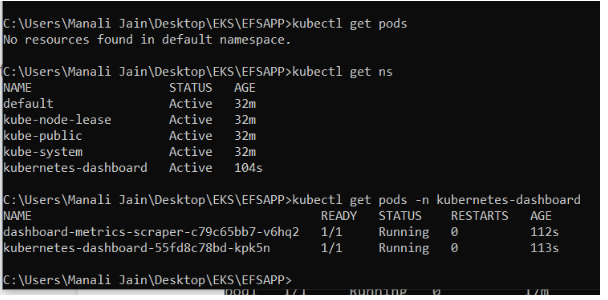
“Kubectl get ns” command will show you the namespaces present in your kubectl.
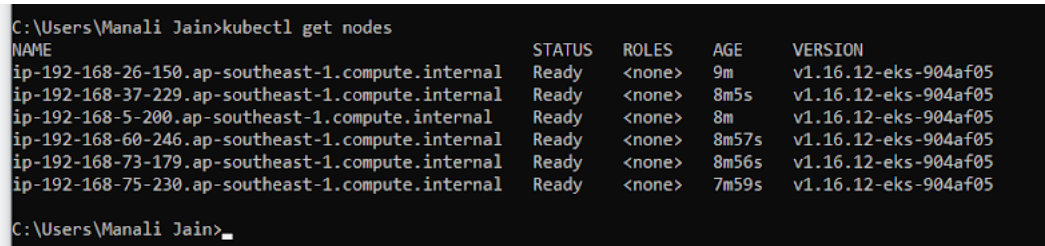
To see the nodes are running or not we use “kubectl get nodes”.
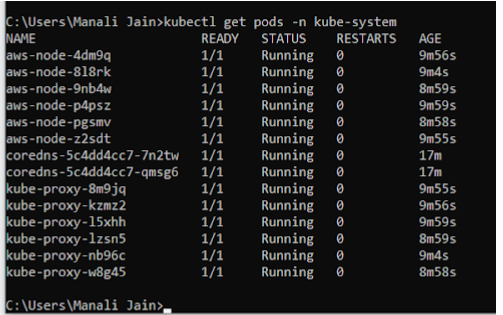
In the Kube-system namespace coredns are running which will be used by us.
- “Kubectl get pods -n namespace_name” will show the pods running inside this namespace.
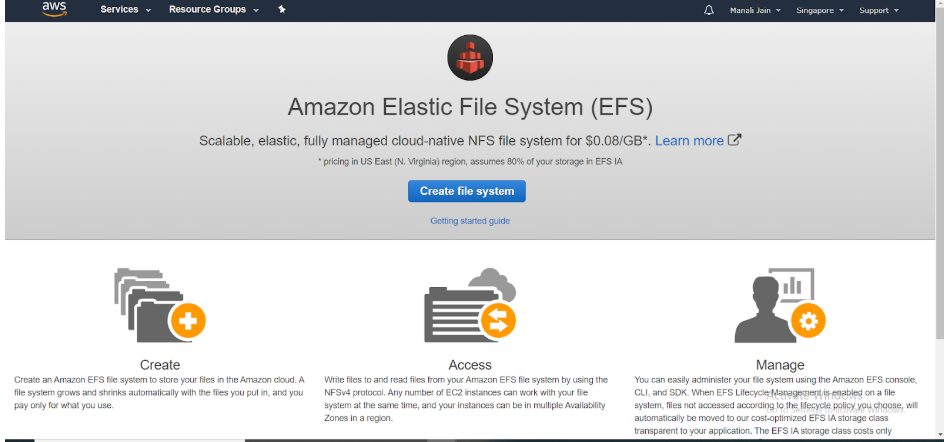
Now, it’s time to integrate EKS with EFS.So search for the EKS service and create it.
Give the subnet same as the instances running in the EC2 services .
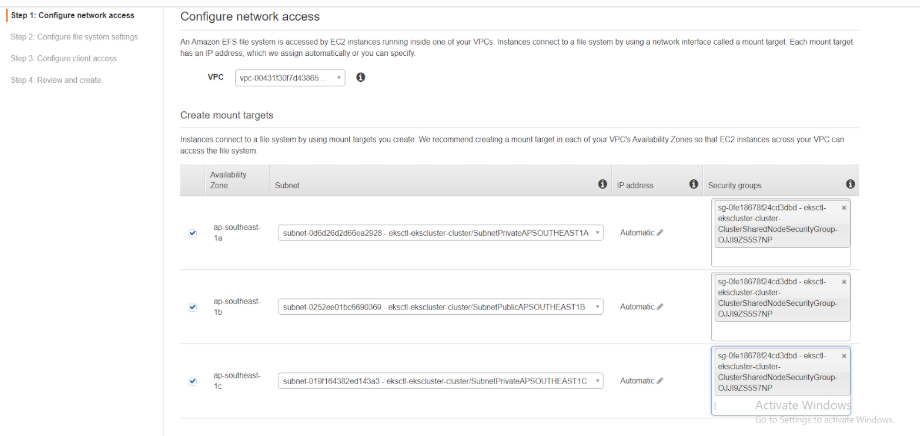
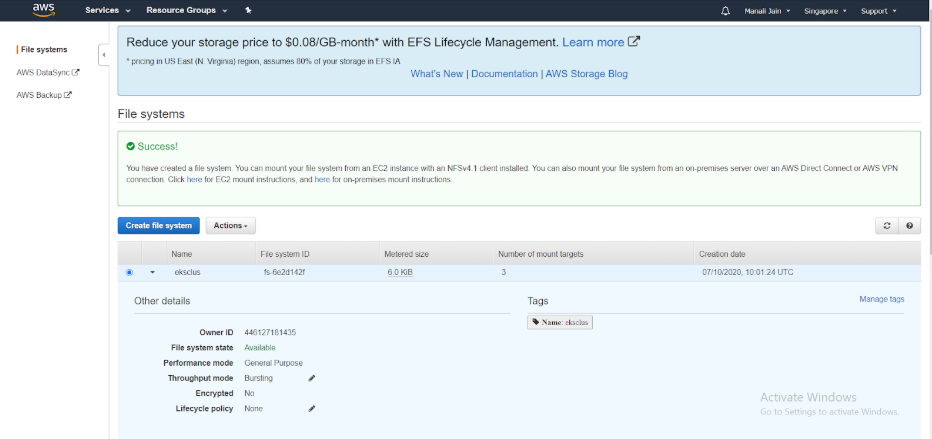
EFS is created by simple clicks. We can also use terraform code here but now I am using WebUI.
- To create a namespace command used is “kubectl create ns namsspace_name”.
- To see the present namespaces command used is “kubectl get ns”.

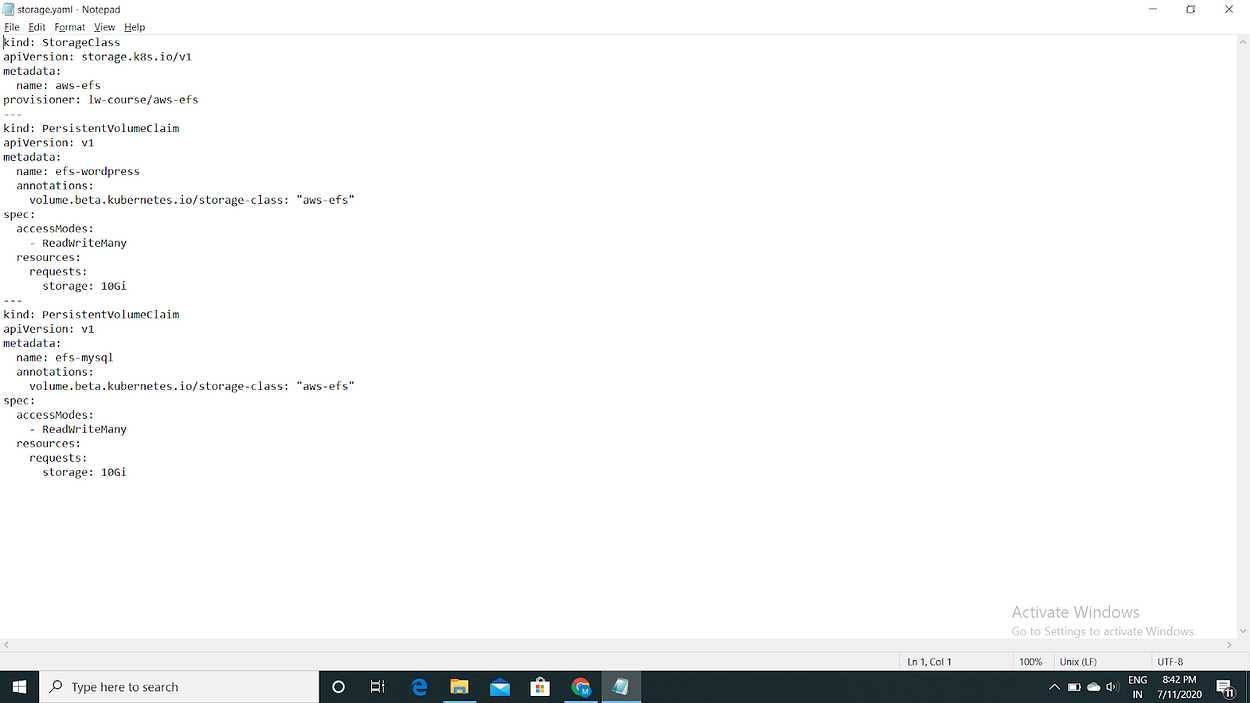
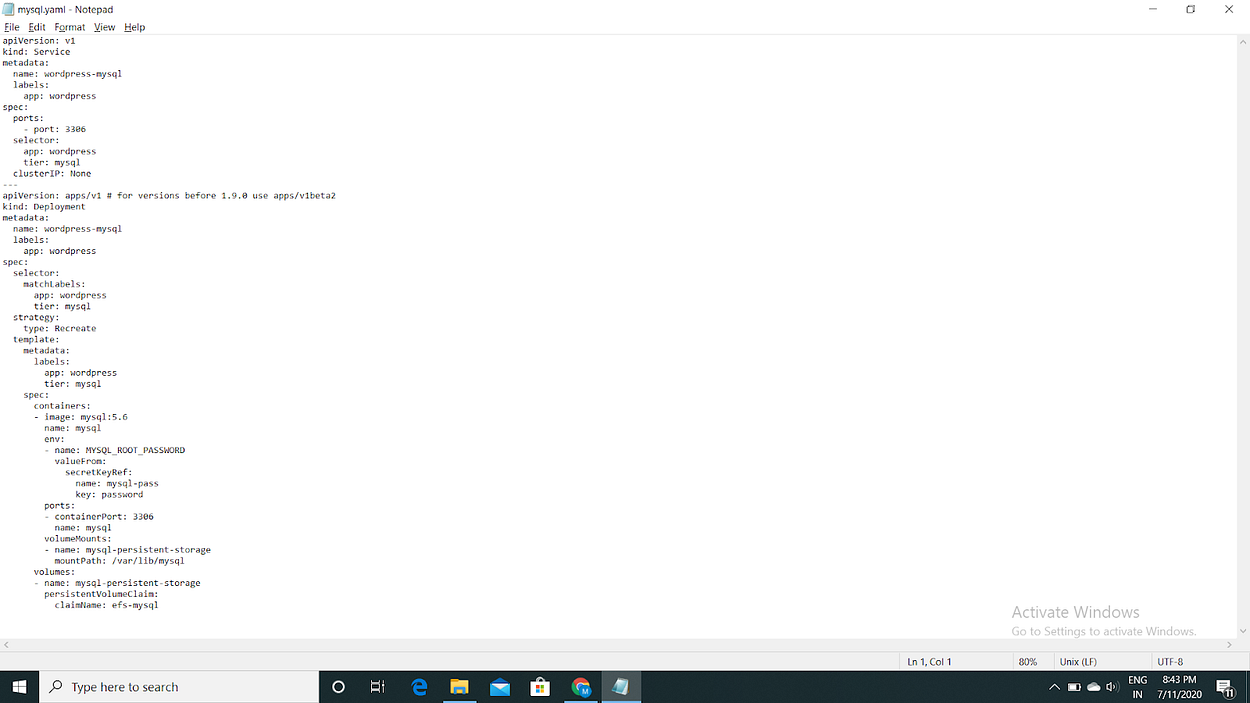
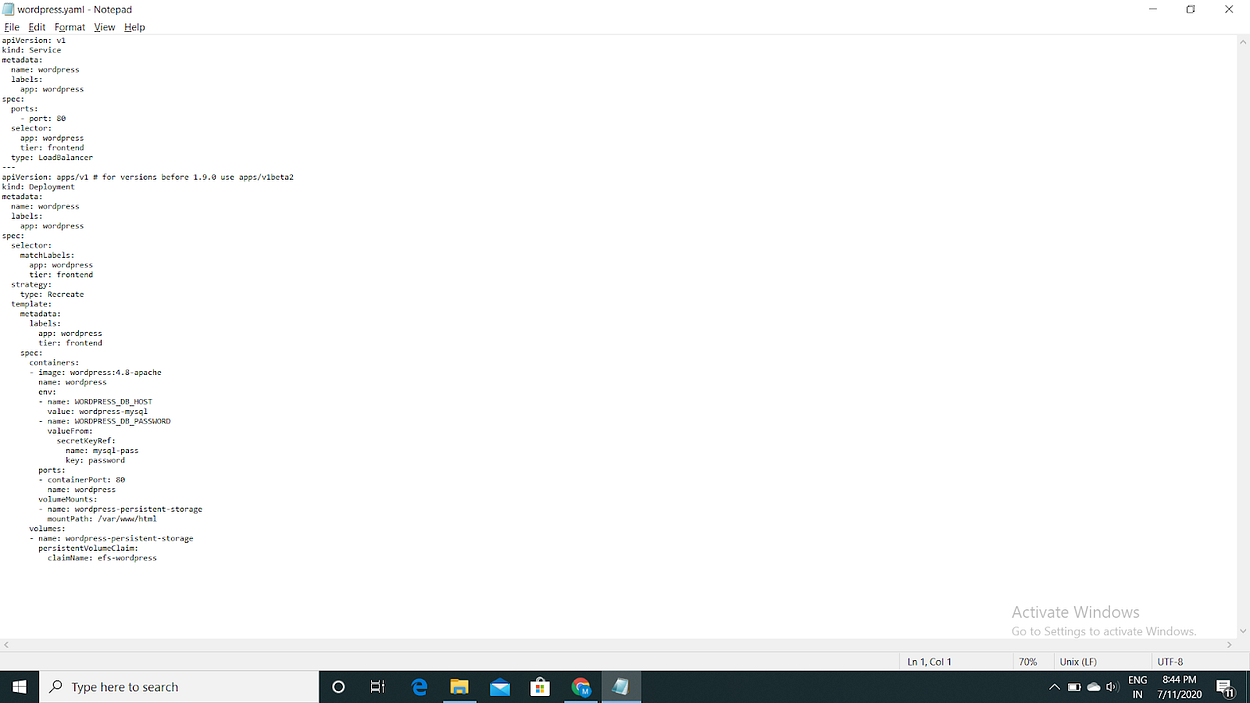
APPLICATION (WORDPRESS + MYSQL)-
- Go inside the folder where your YAML file is present by the command “cd folder_name”.
- “Kubectl create -f file.yml -n namespace_name” will create the pod in the given namespace.


2.

3.

4.

5.

Oh!! Its status is pending now what to do??

Don’t be scared we haven’t made a secret yet.
- The command to make a secret is “kubectl create secret generic secret_name — from-literal=keyword=password -n namspace”.

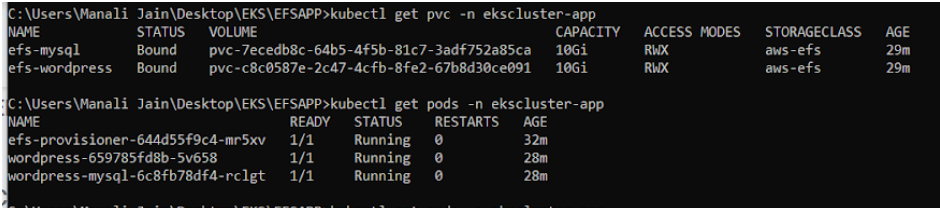
- Command to see PVC is “kubectl get pvc”.
- Command to see PVC in the namespace is “kubectl get pvc -n namespace”.
- Command to see pods is “kubectl get pods”.
- Command to see pods in the namespace is “kubectl get pods -n namespace”.
- “Kubectl describe pods pod_name -n namespace ” command will describe the pod.

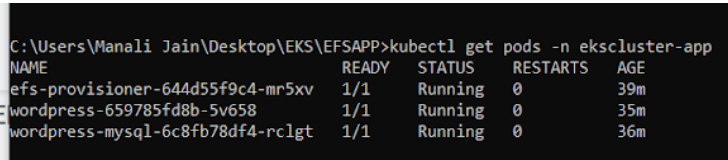
See the pods currently running in your namespace.
More information about the pod is given by the command “kubectl get pods -o wide”.

See the deployment by the command “kubectl get deploy”. If a namespace is not given then see it will show no deploy resource found.

See the deployment in the namespace by the command “kubectl get deploy -n namespace”.

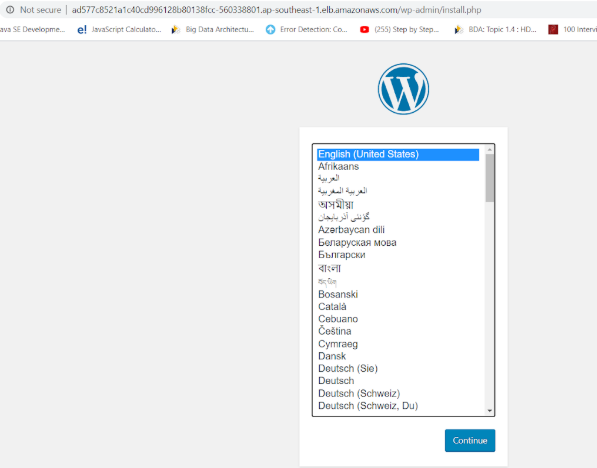
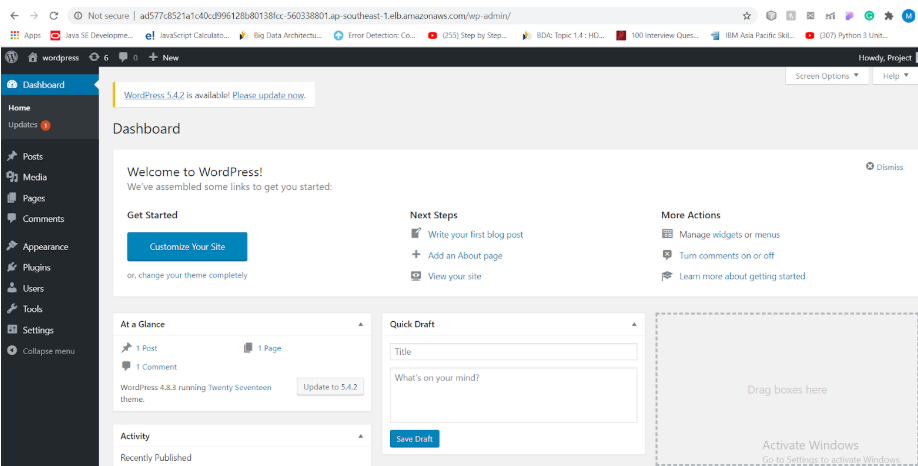
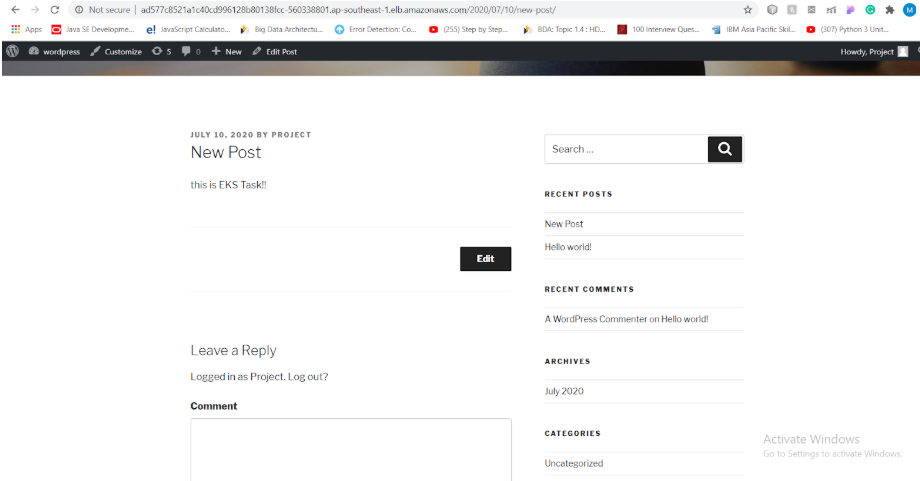
See the WordPress IP and access it.

OUTPUT-


FARGATE CLUSTER-
Fargate is a serverless technology, With AWS Fargate, you no longer have to provision, configure, or scale clusters of virtual machines to run containers.
First, configure AWS account so that in background fargate will connect to it.
FARGATE CODE-
- Create fargate cluster by the command shown in the image.

- Here you can see that fargate cluster is creating.


- This is the cli process for fargate.

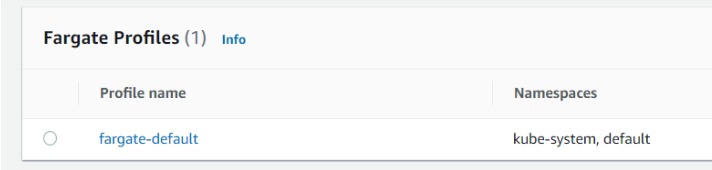
- Fargate profile is created.
- Again update the kube config file and you can view it by the command “kubectl config view”.
KUBERENETES DASHBOARD-
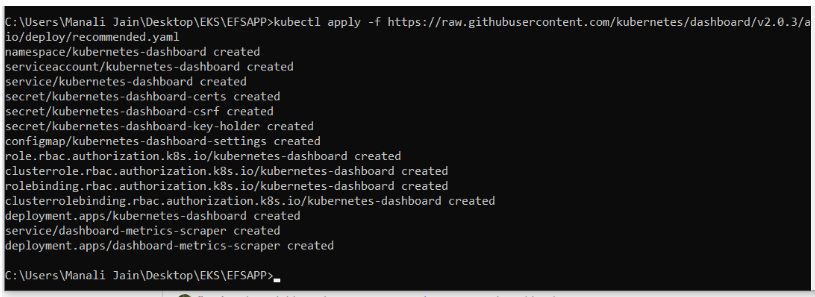
- Install k8s dashboard code by the command-:
kubectl apply -f https://raw.githubusercontent.com/kubernetes/dashboard/v2.0.3/aio/deploy/recommended.yaml
- You can find this command here also- https://github.com/kubernetes/dashboard/releases
- Another namespace created by the name Kubernetes-dashboard.
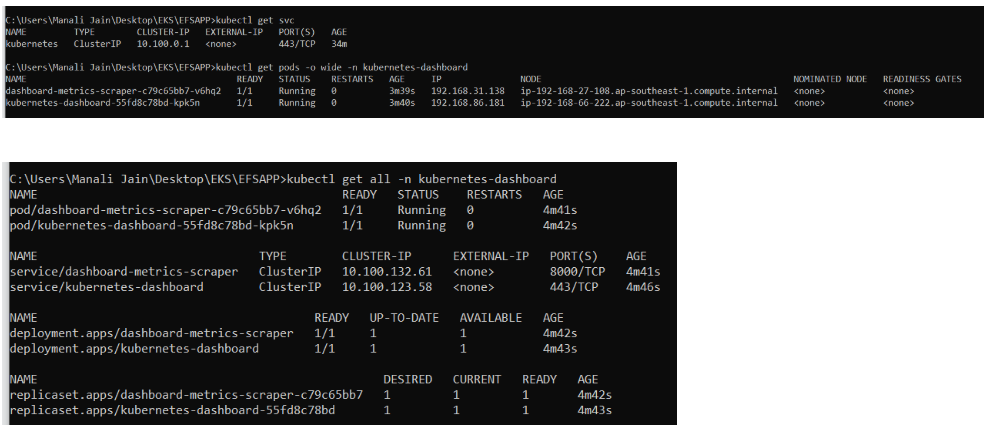
- “Kubectl proxy” command will enable the use of k8s dashboard.

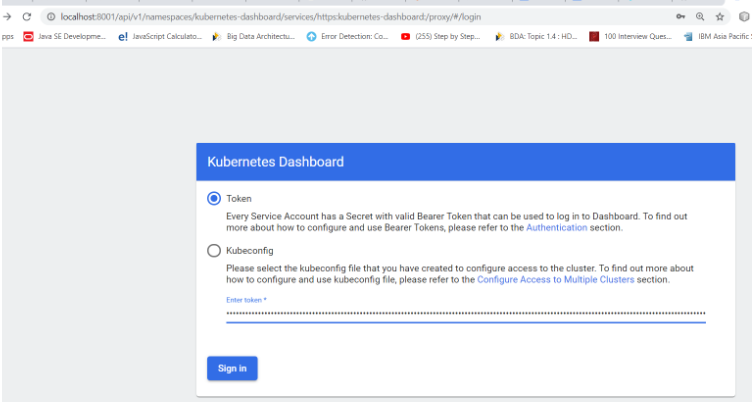
- Access the dashboard by the link:
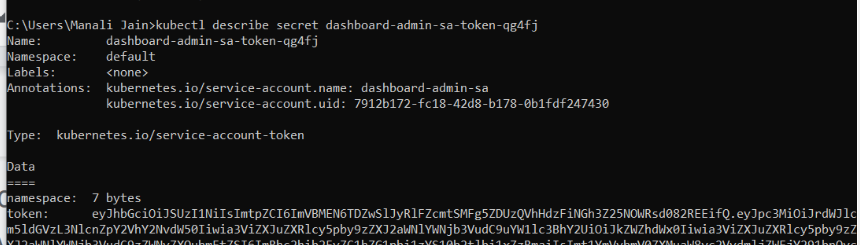
- kubectl create serviceaccount dashboard-admin-sa

- kubectl create clusterrolebinding dashboard-admin-sa — clusterrole=cluster-admin — serviceaccount=default:dashboard-admin-sa
- “kubectl get secrets” command will show the secrets.

- This command will show the token so that you can access your k8s dashboard.
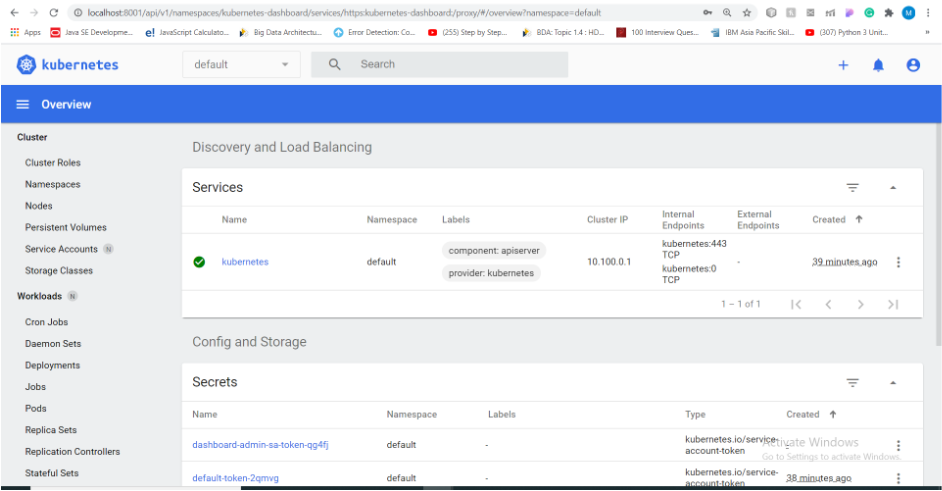
OUTPUT-


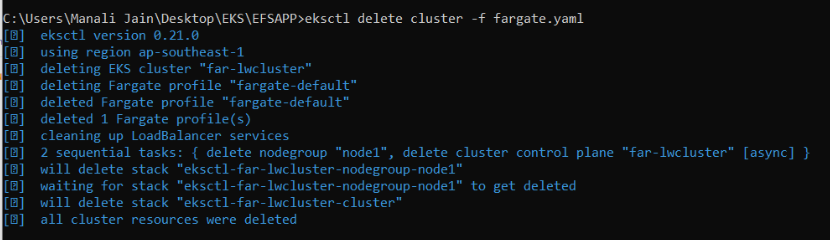
- COMMAND TO DELETE THE CLUSTER “eksctl delete cluster -f file.yml”.
This code is present at GitHub refer this link: https://github.com/manali1230/EKS.git


Comments
Post a Comment